




AI Video Quality Enhancer Online

Use this video quality enhancer to improve soft, noisy, or compressed footage, compare motion and detail, and download a cleaner result online.

BeforeAfter
Mode
Verified output
Upload a video to see its verified output options.

Explore the toolkit

All Tools

Jump straight into a focused workspace for removing or replacing backgrounds and improving video quality.

A Video Quality Enhancer for Everyday Footage

Use the video quality enhancer to compare soft source footage with a cleaner result, inspect real motion, and decide whether the enhanced video quality is ready for your next edit.

Before
After

Improve Video Quality for Social Content

Compressed social exports can lose facial detail, fabric texture, and clean edges. The video quality enhancer gives you a focused before-and-after review instead of judging one still image. Let the enhancer process a representative section, watch the video at normal speed, and compare quality around faces, captions, gestures, and moving backgrounds before publishing another version.

Before
After

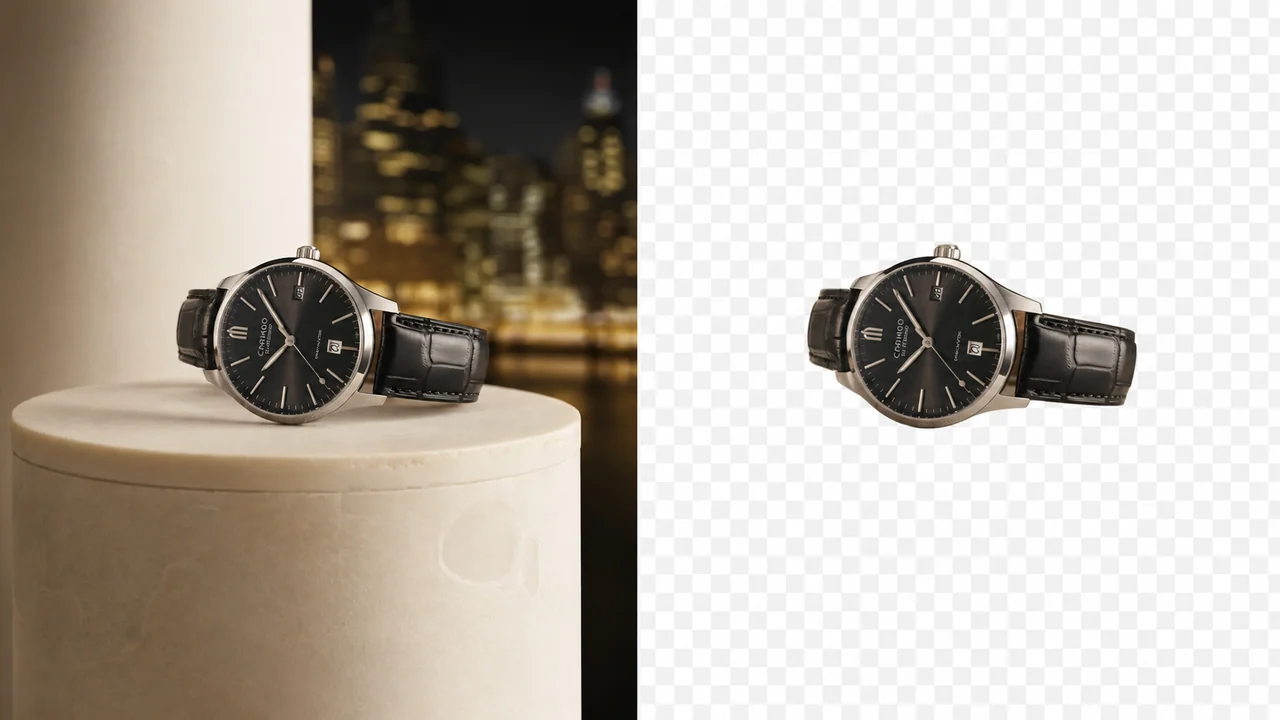
Give Product Video a Cleaner Quality Finish

A product demonstration needs readable labels, stable outlines, and consistent surface detail. Use the enhancer on the most demanding movement first, then compare the enhanced video quality with the original clip. A careful quality review helps you catch halos, excessive sharpness, or remaining compression before the video moves into an advertisement, presentation, or storefront.

Before
After

Use a Video Quality Enhancer on Archived Clips

Older video can contain softness, block noise, reduced contrast, and detail that shifts from frame to frame. The enhancer can improve presentation, but quality enhancement cannot recreate information that was never recorded. Compare several moments, keep the source video, and judge whether the enhancer produces a stable quality improvement without making skin, text, or fine patterns look artificial.

Video Quality Enhancer Features for Careful Review

A useful enhancer should make video quality easier to compare, not hide the source behind a dramatic still image. Review motion, texture, edges, and practical output choices before downloading.

Compare Video Quality Through Motion

Watch the source and enhancer result at normal playback speed. Motion reveals flicker, unstable texture, and edge changes that a paused video frame can hide, giving you a more reliable quality judgment.

Recover a Cleaner Quality Impression

The enhancer can reduce the visual impact of softness and compression so the video feels cleaner. Better quality comes from balancing detail with natural texture rather than sharpening every edge aggressively.

Review Faces, Text, and Fine Detail

Faces, captions, product labels, hair, and repeated patterns are useful quality checkpoints. Inspect these areas after the enhancer runs because they quickly reveal artificial video detail or remaining noise.

Choose the Enhancement Level That Fits

Different source clips need different treatment. Start with the available enhancer option that fits the video limits, then compare whether the resulting quality supports your intended screen size and publishing workflow.

Keep Original Video Framing

Quality enhancement works on the existing composition rather than asking you to crop important content. The enhancer keeps the full video frame available while you inspect clarity, motion, and edge stability.

Test Before the Final Download

Use the preview to evaluate video quality before committing to the final result. If the enhancer output looks oversharpened or unstable, return to the source, choose a better-quality input, or try a more suitable workflow.

Three-step workflow

How to Use the Video Quality Enhancer

The enhancer workflow stays practical: upload a compatible video, select the available quality option, and compare the moving result before downloading.

1

Upload the Best Source Video

Choose a supported file that plays correctly and contains the highest quality available. A cleaner source gives the enhancer more useful video detail and reduces the chance that existing compression will dominate the result.

2

Choose a Quality Enhancement Option

Select the enhancer mode that matches the file, duration, resolution, and output you need. Begin with a representative video section so you can judge quality before processing more footage.

3

Compare the Enhanced Video

Play the result at normal speed and compare faces, text, textures, camera movement, and transitions. Download only when the enhancer produces consistent video quality across the moments that matter.

Video Quality Enhancer FAQ

Practical answers about source quality, enhancement limits, supported workflows, previews, and responsible expectations.

What is a video quality enhancer?

A video quality enhancer processes a clip to improve its visual presentation. Depending on the enhancer mode, it may reduce the appearance of softness or compression and produce cleaner detail. The best quality result still depends on the source video because an enhancer cannot recover information that the camera or earlier export never preserved.

Can the enhancer improve a low-quality video?

The enhancer can make some low-quality video easier to watch, especially when softness or compression is moderate. Severe blur, clipped highlights, missing frames, and unreadable detail cannot always be repaired. Test a difficult section first and compare quality through motion rather than relying on one favorable frame.

How should I compare video quality before and after?

Use the same playback size and watch both versions at normal speed. Check faces, fine text, hair, reflections, patterned surfaces, and camera movement. A strong enhancer result should improve the overall quality impression without adding flicker, harsh outlines, plastic-looking skin, or unstable video texture. Compare the same timestamps rather than two unrelated frames, and pause only after watching each section in motion. Look closely at gradients, shadow detail, bright highlights, repeated patterns, and transitions between cuts. These checkpoints make subtle ringing, banding, color shifts, and inconsistent sharpness easier to identify before an export reaches viewers.

Does the video quality enhancer increase resolution?

Available enhancer modes may offer different output sizes, but a larger video frame does not automatically mean better perceived quality. Inspect whether edges, texture, and motion actually improve. Resolution is only one part of quality, alongside compression, noise, contrast, color, and temporal stability. Compare the video on the device and screen size you expect to use, because an enhancer result can look different on a phone, laptop, or larger display.

Which source gives the enhancer the best result?

Start with the earliest and least-compressed video you can access. Avoid repeatedly downloaded social files when an original export is available. Better source quality gives the enhancer more consistent detail to analyze and usually produces a cleaner video than processing an already damaged copy.

Can I use the enhancer for social and product video?

Yes. The enhancer can support social clips, product demonstrations, tutorials, presentations, and archived footage when the file meets the displayed limits. Always review quality around captions, logos, faces, and products because those areas make video artifacts especially noticeable.

Why does enhanced video sometimes look oversharpened?

An enhancer can emphasize edges that are already noisy or compressed, creating halos and brittle detail. Compare the quality at normal viewing size, not only while zoomed in. If the video looks artificial, use a cleaner source, a more suitable enhancer option, or a lighter enhancement workflow. Halos are easiest to notice around faces, lettering, branches, rooflines, and other high-contrast boundaries. Also watch for grain that freezes in place or changes abruptly between frames. A natural result should retain believable texture without turning every small edge into a bright, rigid outline.

Should I keep the original video after enhancement?

Yes. Keep the source video so you can compare quality, create a different export, or retry the enhancer later. The original also protects you from treating an enhanced file as the only master when another platform, screen size, or editing workflow needs different quality choices.

When is the full enhancer workflow worth using?

Use the full workflow after the preview shows stable quality through movement, cuts, faces, text, and detailed backgrounds. Confirm the displayed file limits and credit requirement before continuing. A short video test helps you decide whether the enhancer result is suitable before processing the complete clip. Compare the preview beside the source at the same size, and check whether the enhancer preserves natural video grain and consistent quality from the first frame to the last. If a difficult scene breaks down, use that section to decide whether another enhancer option or a better video source is needed.

Try the Video Quality Enhancer on Your Next Clip

Upload a source video, compare the enhancer result through real motion, and download only when the quality looks stable across the complete preview.